Tuesday, September 18, 2012

DIY Laundry Soap plus a few extra!

Ok! So it all started when I gave up on regular detergents because of my son Alex.. Alex since a baby was diagnosed with severe Eczema.. So I've always had to buy for him the special laundry soaps with no dyes or harsh chemicals added which, I'm sure if you ever look down that isle in the department store, you can see they are not cheap!! So when I found out I could make my own laundry soap with natural ingredients for pretty much 1/8 of the cost I was ecstatic!!
So here is how I make my own laundry soap!
 
First here are the ingredients you'll need!
 
Take the Fels-Naptha Soap Bar
and grade about 1/3 of it
 
 
On the stove in a large saucer add 6 cups of hot water and the grated soap..
Let the mixture simmer until the soap is dissolved.
 
 
Then take 1/2 cup of washing soda and 1/2 cup of Borax
 
 
Add it to the pot and stir frequently until everything is dissolved!
It will be quite foamy!
 
 
Next in a large bowl add 4 cups of water
 
 
Then take the pot from the stove and add it to the bowl of water!
 
Then I took an old 2 gallon jug of laundry soap that was used up..(rinse it first0
and I added 1 gallon of water... (use a funnel) the soap mixture in the bowl and then another 4 cups of water!
 
 
Then to add some scent I added about 20 drops of Orange Essential oil!
(Now something I just learned over this last weekend was that different essential oils have different Beneficial properties.. like Orange is a natural Antibacterial agent... While Lavender is an antibiotic,anti fungal,antiviral, and an antibacterial agent.. You can find a list on line of what each scent has to offer as far as benefits!)
 
 
Then I put the lid on the jug and just shook it a few times!
Then let it sit overnight and it'll become like a soupy gel!
 
 
You can make a lot of house cleaners from borax, lemon juice and vinegar!
Here are a few recipes I got this weekend that I all ready tried and liked!
 
Fresh Bathroom Disinfectant
2 cups water
1 cup white vinegar
2 teaspoons borax
1/4 cup of lemon juice
 
combine/shake in spray bottle then use!


Toilet Bowl cleaner!
1/2 cup baking soda
1/4 cup white vinegar
1/4 cup of lemon juice
 
add directly to the bowl.. let it foam up a few minutes.. then scrub with brush and flush
 
 
All purpose cleaner
1 teaspoon castile soap
1/4 cup white vinegar
1/4 cup lemon juice
2 cups water
6 drop orange essential oil
1 teaspoon borax
 
combine is spray bottle.. shake.. use!
 
Also Murphy's oil with some water and essential oil makes a great degreaser/wood cleaner!
 
Hope these were helpful!!!


Monday, September 10, 2012

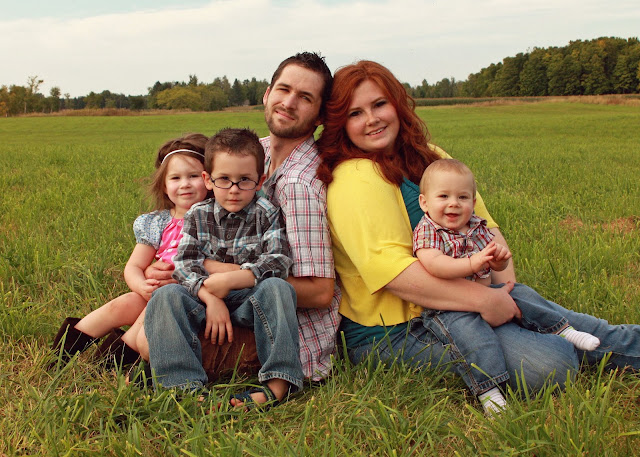
Update: Family Pictures!

I am so in love with how our family pictures turned out!!
We've never had them done as a family untill now and they turned out exactly how I imagined!!
Thanks to my awesome friend Nikki fromNikki's Portrait Photography for taking them!
So here's my family! :)


Wednesday, June 20, 2012

The Lexie Play-Outfit!

New Item for My Collection!


So I made my own pattern last night and I think it actually turned out great!! I wanted to do a tunic like top with some hot pants! And I'm happy with the results! So I decided to add it to my collection and I'm going to be make a few in every size and I'm going to play with different patterns too! 
When I get time and after I make all the of sizes I'll post a tutorial just in case you feel creative and would like to make one yourself!
Here are my results!


Tuesday, June 19, 2012

Kids Shows with Stupid Parents???

Hey guys and gals! So I thought today I'd put out a post on kids cartoons.. I usually after lunch time let my kids watch about 1 hour of tv..mostly because my son Zane (the baby) usually take his long nap around the same time so it keeps the other 2 entertained and quiet. Well as I was flipping the the channels, I came onto "The Rugrats Movie"

 and I was so excited cause it's a movie I had watched when I was younger! So we started watching it and I actually was kind of upset at whole idea of Rugrats! I'm not one to say "tv and the media are shaping a generation" but after watching the movie it got me questioning things.. I couldn't believe how the cartoon really dumbed down the parents and the adults but yet raised the intelligence of children to the fact that they were mentally and emotionally superior to the adults in their lives! It was almost insulting, then I got back to thinking about other cartoons and tv shows from that generation like: Hey Arnold, Dexter's Laboratory, The Fairly OddParents, Jimmy Neutron, Even Stevens, Lizzie Mcquire and probably more that I can't even think of, but all of them in some way made the parents stupid.. and I'm not saying they aren't' funny and they aren't entertaining, I used to love all of those shows but now that I'm a parent I'm not sure if I want my kids being filled with those kind of ideas.. I mean if you just look at the lack of respect towards those in authority there seems to be in children and even my own generation today, it almost makes sense.. I just think from now on I'm going to be more involved with what my kids are watching.. 
I know there are extremists out that that say: all tv is bad unless it's educational, but I don't believe that either! I think it's ok for kids to have just fun entertaining cartoon.. I just want to make sure that my kids, in every aspect of influence in their life, that they are being taught good morals that respect others and treat others like they would be wanted to be treated themselves!! And believe it or not parents whether you admit or not TV is a HUGE influence on kids! I mean it cracks me up on how you cant keep a kids attention for more than a few seconds but once that tv is on.. they can sit still forever!! lol! Hope this was helpful! Thanks for reading my thoughts today! ;)
Tara

Sunday, June 17, 2012

Belly Band!! and Shout out to Nikki's Portrait Photography!

I'm so excited about this blog post! I was asked to make a belly band for Nikki from Nikki's Portrait Photography for a maternity photo shoot she was going to do. At first I wasn't sure what a belly band was but after she sent me pics, I was so excited to make one!! It is the cutest thing ever and as usual the pictures turned out amazing!! Nikki is so awesome and if you're in the Park Falls area and want to get pictures taken I think she does almost anything and the pictures turn out amazing! If you look back to my Christmas Jammies post you can see some of her pictures she took of my kids! 
And also a huge Thank You to Lisa! The very beautiful soon-to-be mommy modeling the belly band!
Thanks for letting me use your pictures! 


Again check out Nikki's Web Page HERE
And Her Facebook HERE

Tuesday, May 22, 2012

Pieces of my Craft fair collection!

So I've been working on some hair pieces lately for the craft fair I'm doing this summer!
I'm so excited but still have so much work ahead of me!
 My goal is to have 100 hair pieces
10 pettiskirts
20 tutus
10 little girl formal dresses
20 Summer dresses
and 10 infant outfits with matching shoes
I'm only 1/4 way there.. so these next couple months will be crazy!

But I wanted to show some hair pieces I've accumulated!


Monday, May 21, 2012

The Pettiskirt...

Well I started off on this endeavor thinking that it was going to be so much Fun to finally make one of these and then I finally made one and let me tell ya.. I completely have No Patience.. Ha Ha! But even though it wasn't as fun as I thought it would be, it definitely was worth it in the end! They are so adorable and really not that difficult to sew.. it's just the cutting and measuring and piecing together that takes the longest!
So with out further delay here is the tutorial on how to make a full pettiskirt!

First You want to make sure you are using the right material.
I used NYLON Chiffon (Not Polyester)
because Nylon Chiffon doesn't fray so there is no need to interlock your edges!
Then for the top I used Satin
Then of course some 3/4 in Elastic
and a satin ribbon

So yeah and I guess (I found this out after I all ready made my skirt) you can buy Nylon Chiffon precut in rolls, so that you don't have to cut it all out.
That would save a ton of time but if you're like me and missed that memo
then you'll have to cut it out!


The Skirt is made up of 3 tiers (Like a cake!)
 You'll need to cut out your top two layers (the Pink Layers in my skirt)
And you'll need to cut out everything in 2s!!
Your actually making two skirts that will be layered on top of each other..

Here are the Dimensions


I ended up having to sew alot of ends together..
but dont' worry sewing the bottom ruffle (blue layer)
together I'll show you a faster way with that layer later on

Now we're on to the ruffling of the Bottom Ruffle
Basically: Set your machine to the longest stitch and then tighten the tension so that the fabric will ruffle as you go!


Now when you get to an end of the one of the ruffle pieces just lay the next section on top of the piece you're all ready sewing like this


Keep going until you have a the whole 30 yards ruffled..
Then start on the 2nd Bottom Ruffle (and repeat the process)


Next you want to take the Middle Layer and attach 1 of the 30 yard ruffle piece to the the edge.. just use a basic stitch all the way down the center of the the blue Ruffle
(Make sure that your sewing on the right side of the Middle (pink) layer


Then take the top edge of that middle layer and make a gathering stitch


Then attach it the Top Layer:
Make sure right sides are together
and then do another gathering stitch along the top of that layer


(Repeat processes for the skirt)


Next Cut out a piece of Satin..
My daughter is in a 3T
so I cut out a piece of Satin that was 8 inches wide by 40 inches long


Next cut out two strips of Fusible Interfacing
 1/2 inch wide by 40 in long


Iron it on the wrong side of the Satin


Next fold in half with right sides touching and sew along the edge but make sure to leave a 1 inch space about 4 inches down.. (I forgot and had to go back in fix it)


Then fold it in half the long way with the seam in the front middle


Then Sew and Stitch for your elastic casing all the way around about 1 inch down


Next take your skirt and gather it up enough to match the 40 inches on the Satin piece


Then take the bottom layer and stitch it to the bottom layer of the Satin
like so
I then also serged it to add extra strength


Then do the same for the Top Layer


If you open up the Satin piece it should look like this


Take your elastic (Measure your daughters waist and then minus 4 in to get the right Elastic measurement)
and sew 15in ribbon pieces to each end


then using a Safety pin as a guide thread the ribbon and elastic through the casing

Then Phew... YOU"RE DONE!!
YAY!!
Isn't it worth it!! :)

My daughter loved hers so much!


(Check out my TUTORIAL on how to do your own iron on Appliques like you see on my daughter's shirt here!)