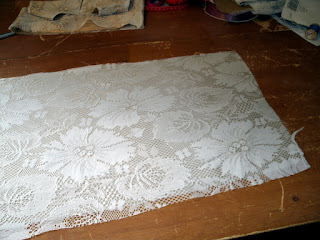
Hello! I"m back with another Tute! Well, as you know I'm a huge thrift shopper and I happened to stumble across this ugly lace curtain! haha! But I loved the lace pattern! It has like big flowers and leaves on it so I immediately knew what I wanted to do! Make a cute Fall Dress for my daughter!
And here's how ya do it!
Materials needed:
2 lace curtains ( about a yard a piece)
2 yards Beige Satin Fabric (could use cotton too and any color)
about a yard of complimentary satin fabric (for waist sash)
left over scraps for accessories
matching thread
iron
metal clasp or a button
ruler
scissors
bodice pattern
Ok! First step!
Lay out your fabrics and Iron!
It's a lot easier to measure and cut if the fabrics are ironed!
Next Step: Use any bodice style pattern you have on hand! My girl is in a 3T so I just found a standard bodice pattern online that I could print!
Make sure it has both the back and front pattern piece!
Then go ahead and cut both the front and back bodice piece out of your satin!
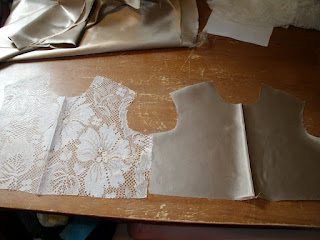
Next step: Time to cut the lace! I used the satin piece I all ready cut out as the pattern instead of the paper so I could get it as close as possible to match!
Next Step: with WRONG sides facing together, (we want the shiny side of the satin to peer through the lace.. so make sure shiny side is face down on table) pin lace and satin together
Next step: Sew in place!
and Here's what it should look like from the back!
Next step: cut and trim off access in corners
Then flip inside out at iron flat!
Repeat these steps for the front and back bodice pieces!
Next Step: Flip Back Bodice piece back to outside in!
Then straight down the middle cut about 2.5 to 3 inches
Then sew around slit.. This is made so you can easily slip the dress on and off..
we'll be adding a clasp later!
Flip inside out and iron again!
Next Step: Take both bodice piece with right side facing, pin the shoulder straps together!
Then Sew in place... (I always sew right sides together then I flip the seam out and sew down again. This way all rough edges are down)
Do that for both sides and then Sew down the sides of the bodice
(sew down edges too)
And there's your bodice!!
Next step: The Skirt!! Almost There!! :)
I cut the satin and lace to measure about 12 inches wide and about 30 inches long.. Make 2 sets!!! (2 satin cuts and 2 lace cuts)
Then with WRONG sides together, Sew both sides and only 1 length side!
Then flip inside out and iron down!
Repeat with 2nd set!
Then with right width sides together sew each skirt piece together.. to create a loop!
Then sew down raw edges..
Next step: With the Open raw edge of the skirt sew a basting stitch all the way around!!
Then (I used an older picture before I did the basting) place bodice inside skirt loop till raw edges are together..
make sure right sides are facing!!
(Remember your skirt should have a basting stitch in it all ready, unlike the picture!!
Then adjust skirt so it fits bodice just right and then pin skirt to bodice
Sew in place...
Then trim off raw edges
Then flip inside out! Sew Raw edges down around waist and Wah lah!!
It's a dress!!
But we're not done yet!! :)
For the sash! Take your fabric and cut it to desired length and width.. sew right sides together length wise and then flip inside out!
Then tuck in raw side edges and sew down!
Next Step: Position the sash over the waist hem of the dress and pin in place over side hems..
I kinda gathered mine on each side.
Sew in place!
Oh and lets not forget the back!!!
Grab your clasps or button and hand sew in the slit of the back!
And Here it is!!
Now if you want to take it a step further!
Add a pretty flower or bow the front as well!
I hope you enjoyed this tutorial! Please let me know if you make one I'd love to see pictures!!!


