Thursday, February 24, 2011
Blue Satin Sashes! These are a few of my Favorite Things!!
Have you ever just stared at a piece of fabric??? I did! Today for like 20 minutes! haha! I got this sheer blue poka dot fabric about 2 months ago at a thrift store and I loved it right when I saw it.. but when I brought it home I had no idea what I could use it for.. I'm not a fan of sheer fabric just because you have to either find a lining or wear an undershirt.. So today I actually had no intention of sewing and actually I was trying to clean my sewing room when I found that fabric today! And I finally came up with a purpose to this fabric! I paired it with a grayish blue satin and a black satin.. Then I also made today for the first time a bolero jacket! Which was easier then I thought it was going to be! There is no Tutorial for this one but I hope you all like it!
Tuesday, February 22, 2011
Fun Hair Clips!!
Ok! My little girl's hair is getting so long but I still don't want to cut it! So she almost always has a pony tail in to keep the hair out of her eyes.. so I decided to make some cute hair clips! They are super easy and super cheap and no sewing is needed!!

First I bought these metal hair clips for only $1.00 at Family dollar..
Then I took some brown ribbon and my super glue gun to make a cover for the metal clip..
Then next you just add whatever you'd like to!
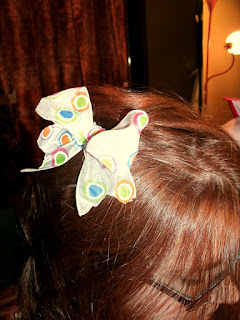
I used ribbon to make bows and flowers:
Here's some of my finished ones

Saturday, February 19, 2011
My Easter Dress Tutorial!
Ok I know what you're thinking.. Easter all ready? lol! Well I kinda started it early because I'm soon gonna be making costumes for our churches Easter Production coming up.. so I know that will consume most of my time so I figured I doing now! Which I'm so glad I did cause it turned out great! It's actually a real personal dress.. The fabric I made it out of was found in the storage of my grandmother's house and it's actually the fabric my Grandma made my mother's bridesmaid dresses out of!!! It was so exciting to get this fabric cause it kinda feels like a family heirloom..
So here's a close up of that fabric:
You'll need about 2 yards for the skirt (I like mine really full)
Then about 3 yards for the ruffles on the bottom of the skirt (I used a purple satin)
Then about 1/2 yard for the bodice
(I used the purple satin as the lining and I used lace as the front)
Next you'll need about a yard of 3in wide ribbon
about 10 inches of thin ribbon
5 buttons
: and scraps for making bows and flowers
So first step is cut out your bodice and skirt and ruffles:
I used an online pattern for the bodice for a 3T..
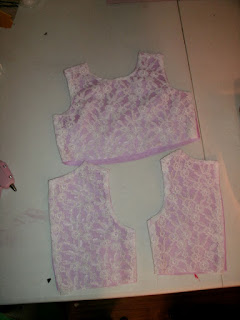
the bodice should look like this:
here it is with the lace and the back
Next with right sides together, sew the lace and the satin together..
only along the sides,next, and sleeve area.. DON"T SEW THE WAIST
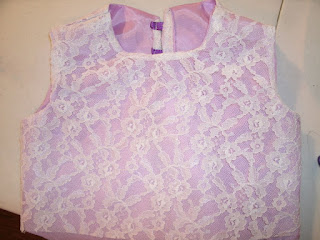
Flip inside out
Do this for all three bodice pieces:
I pressed them after wards to get my seams and points more even
Next I sewed the bodice together at the sides:
I sewed with right sides together and then added another stitch to hold the seam down
Do for both sides;
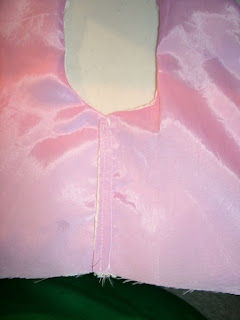
Then fold the back seam over about 1/4 inch and add ribbon for button loops:
like this
Then sew one stitch all the way down..
on other side just add 1/4 inch seam
Next sew top straps of bodice together with right sides together
Now for the bottom.. use two yards but cut the length of the skirt to measurement
Sew ends together (right sides) to make a loop
place aside:
Next is the ruffle
I took about 3 yards of the purple satin (I had to sew ends together to get length)
I made it about 8 inches wide
then I just folded it in half width wise and sew together
hem doesn't need to be fancy because it won't be seen
Next pleat it and pin it to the bottom of the dress with right sides together
Here's what we got so far
next is to sew the bottom to the bodice with right sides together
I pleated this also.. I used two yards so it took long to pleat and make even
but it makes the dress fuller
Sew together and you're almost done!
Next I added a ribbon to the front and hand sewed buttons to the back
Then I tried it on her to make sure it fit..
and it did! yay!
Next ACCESSORIZE!!!
I added flowers to the front ribbon:
Next I gathered the skirt in the front with a basting stitch and I added a lace bow:
Then I made a matching headband
End result:
Hope you enjoy this!!!!
Subscribe to:
Posts (Atom)


